Why Ethanol Fuel Destroys RV Generator Carburetors in Florida
Florida's standard gasoline is E10 - a blend of 90 percent gasoline and 10 percent ethanol that is required by the EPA's Renewable Fuel Standard. This is the fuel sold at virtually every gas station in Winter Haven, Lakeland, and across Polk County.
For most vehicle applications, E10 performs adequately. For RV generators that sit unused for weeks or months between camping trips, E10 is a significant maintenance problem.
Ethanol has a much shorter storage stability than pure gasoline. In Florida's heat - where fuel tanks in outdoor-stored RVs regularly reach 90 to 100 degrees in summer - ethanol fuel begins to separate and oxidize within 30 to 45 days. The volatile aromatic compounds evaporate or deteriorate, leaving behind a sticky, varnish-like residue that adheres to any surface the fuel contacts.
The carburetor's internal passages are precisely sized - the main jet, pilot jet, needle valve seat, and emulsion tube passages are measured in thousandths of an inch. The varnish deposits that form in these passages from degraded ethanol fuel are often thin enough to be invisible but sufficient to partially or completely block fuel flow. The result is a generator that cranks without starting, or one that starts and immediately dies, or one that runs at idle but dies when you apply an electrical load.
We see this problem constantly in Winter Haven. The pattern is seasonal and completely predictable: snowbirds arrive in October and November, pull out their generator for the first time in months, and discover it won't start. The solution is almost always a carburetor cleaning - followed by the recommendation to use fresh fuel with a stabilizer before any storage period.
What Carburetor Service Involves
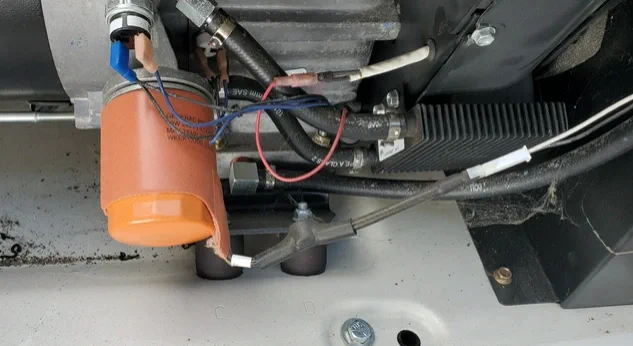
Carburetor service for RV generators is a more involved procedure than spraying carburetor cleaner into the intake. The varnish deposits in a severely restricted carburetor require complete disassembly to access and remove. Spray-only treatments reach the large bores but cannot reliably clear the small-diameter jets where most of the restriction occurs.
Carburetor Removal
We begin by removing the air cleaner assembly and disconnecting the fuel line from the carburetor inlet. The throttle linkage and choke cable are photographed and then disconnected. The carburetor is unbolted from the intake manifold and removed as a complete assembly.
Disassembly and Soaking
With the carburetor on our work surface, we remove the float bowl, float, needle valve, and all jets. We note the needle position if applicable. All components go into a parts washing container with professional carburetor cleaning solution - not the aerosol can variety but the commercial solvent used for thorough cleaning of stubborn varnish deposits.
Soaking time varies by the severity of the restriction. Light varnish may clean in 30 minutes. Heavy buildup from a multi-year storage may require 60 to 90 minutes of soak time with an intermediate brushing cycle.
Jet Cleaning and Verification
After soaking, we clean each jet with a soft brass brush and then clear them with compressed air. We never use wire or drill bits to clear jets - this permanently enlarges the bore diameter and ruins the carburetor's calibration. We hold each jet up to the light after clearing to verify the passage is completely open.
The needle valve seat and float are inspected for wear and damage. A worn needle valve seat allows fuel to flood the engine; a saturated float changes the fuel level in the bowl. We replace these components if they show wear regardless of whether they caused the current problem.
Reassembly and Tuning
We reassemble the carburetor with new gaskets and O-rings from a rebuild kit specific to the generator model. The carburetor is reinstalled with appropriate torque on the mounting nuts to avoid distorting the intake manifold gasket. We reconnect the linkage, choke cable, and fuel line.
After starting the generator, we run it at no-load for 5 to 10 minutes to confirm idle stability, then apply rated electrical load (typically 3,000 to 4,000 watts for most RV generators) and observe engine response. A properly cleaned and tuned generator should accept full load without hesitation or surge.
When Carburetor Service Is Not Enough
Carburetor cleaning resolves the fuel delivery issue in most not-starting generator calls. However, if the generator has been sitting for an extended period, additional issues may be present: the fuel tank may contain old fuel that re-contaminates the freshly cleaned carburetor, the air filter may be clogged or deteriorated, the spark plugs may be fouled from the rich mixture that occurs when trying to start a varnished carburetor, or the oil level may be critically low.
We check and address all of these items as part of a complete generator service. Running a generator that was restored to starting condition on stale fuel in the tank is counterproductive - the varnish cycle simply repeats in weeks rather than months.
How to Prevent Generator Carburetor Problems in Winter Haven
Prevention is straightforward. Before any storage period longer than 30 days - whether seasonal storage between camping trips or a summer break from full-time use - add a quality fuel stabilizer to the generator fuel tank and run the generator for 15 minutes to circulate the stabilized fuel through the entire fuel system including the carburetor bowl.
Sta-Bil, PRI-G, and Sea Foam are all effective stabilizers for this purpose when used in the correct ratio per gallon of fuel. A treated fuel tank will remain usable for 12 to 24 months, compared to 30 to 45 days for untreated ethanol-blend fuel in Florida heat.
For extended storage, some owners drain the carburetor completely by closing the fuel shutoff and running the generator until fuel starvation stops it. This eliminates the fuel that can varnish the passages but also means the generator must be primed before the next start.